> ## Documentation Index
> Fetch the complete documentation index at: https://meilisearch-6b28dec2-mintlify-code-samples.mintlify.site/llms.txt
> Use this file to discover all available pages before exploring further.

# Postman collection for Meilisearch

> This how-to guide explains how to use Postman when testing and debugging Meilisearch's API.

Are you tired of using the `curl` command in your terminal to test Meilisearch? It can be tedious to re-write every route when wanting to try out an API.

Postman is a platform that lets you create HTTP requests you can easily reuse and share with everyone. We provide a <a href="/docs/assets/misc/meilisearch-collection-postman.json" download="meilisearch-collection-postman.json">Postman collection</a> containing all the routes of the Meilisearch API! 🚀

If you don't have Postman already, you can [download it here](https://www.postman.com/downloads/). It's free and available on many OS distributions.

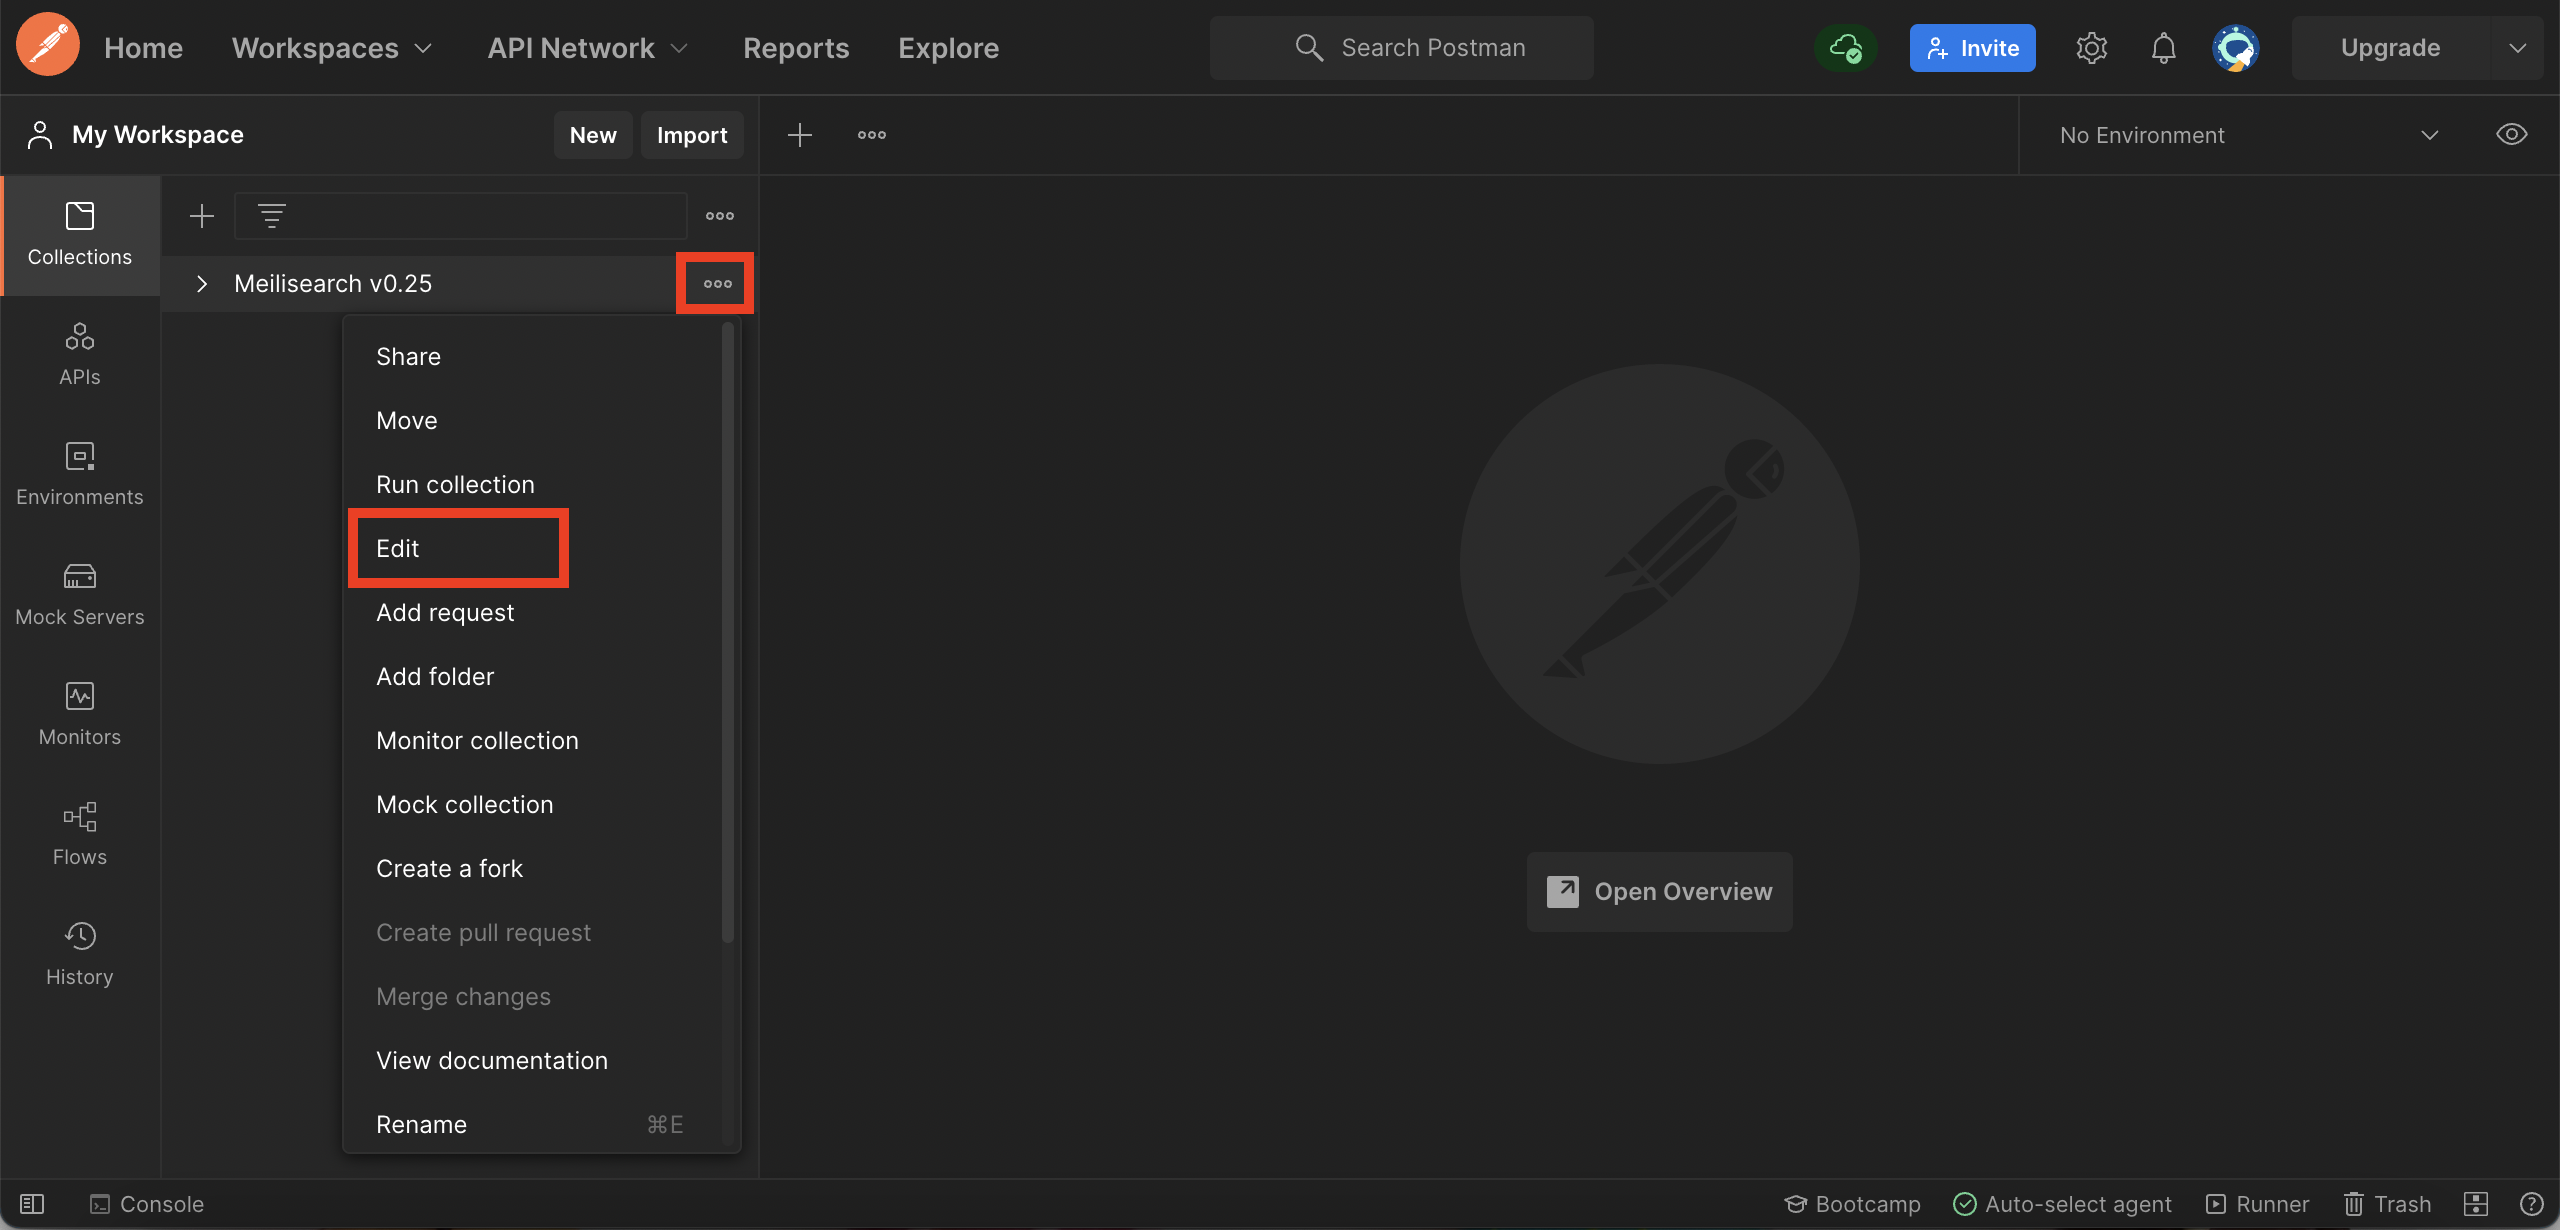
## Import the collection

Once you have downloaded the <a href="/docs/assets/misc/meilisearch-collection-postman.json" download="meilisearch-collection-postman.json">Postman collection</a>, you need to import it into Postman.

<Frame>
  <img src="https://mintcdn.com/meilisearch-6b28dec2-mintlify-code-samples/G0_zdir0oCeS2jWE/assets/images/postman/import.png?fit=max&auto=format&n=G0_zdir0oCeS2jWE&q=85&s=5beff30e04974d38ae356f6e5bf825f8" alt="The 'Import' button" width="2560" height="1230" data-path="assets/images/postman/import.png" />
</Frame>

## Edit the configuration

<Frame>
  <img src="https://mintcdn.com/meilisearch-6b28dec2-mintlify-code-samples/G0_zdir0oCeS2jWE/assets/images/postman/edit.png?fit=max&auto=format&n=G0_zdir0oCeS2jWE&q=85&s=3ad373539d1375c9164e83415ce4cd9d" alt="Selecting 'Edit' from the overflow menu" width="2560" height="1230" data-path="assets/images/postman/edit.png" />
</Frame>

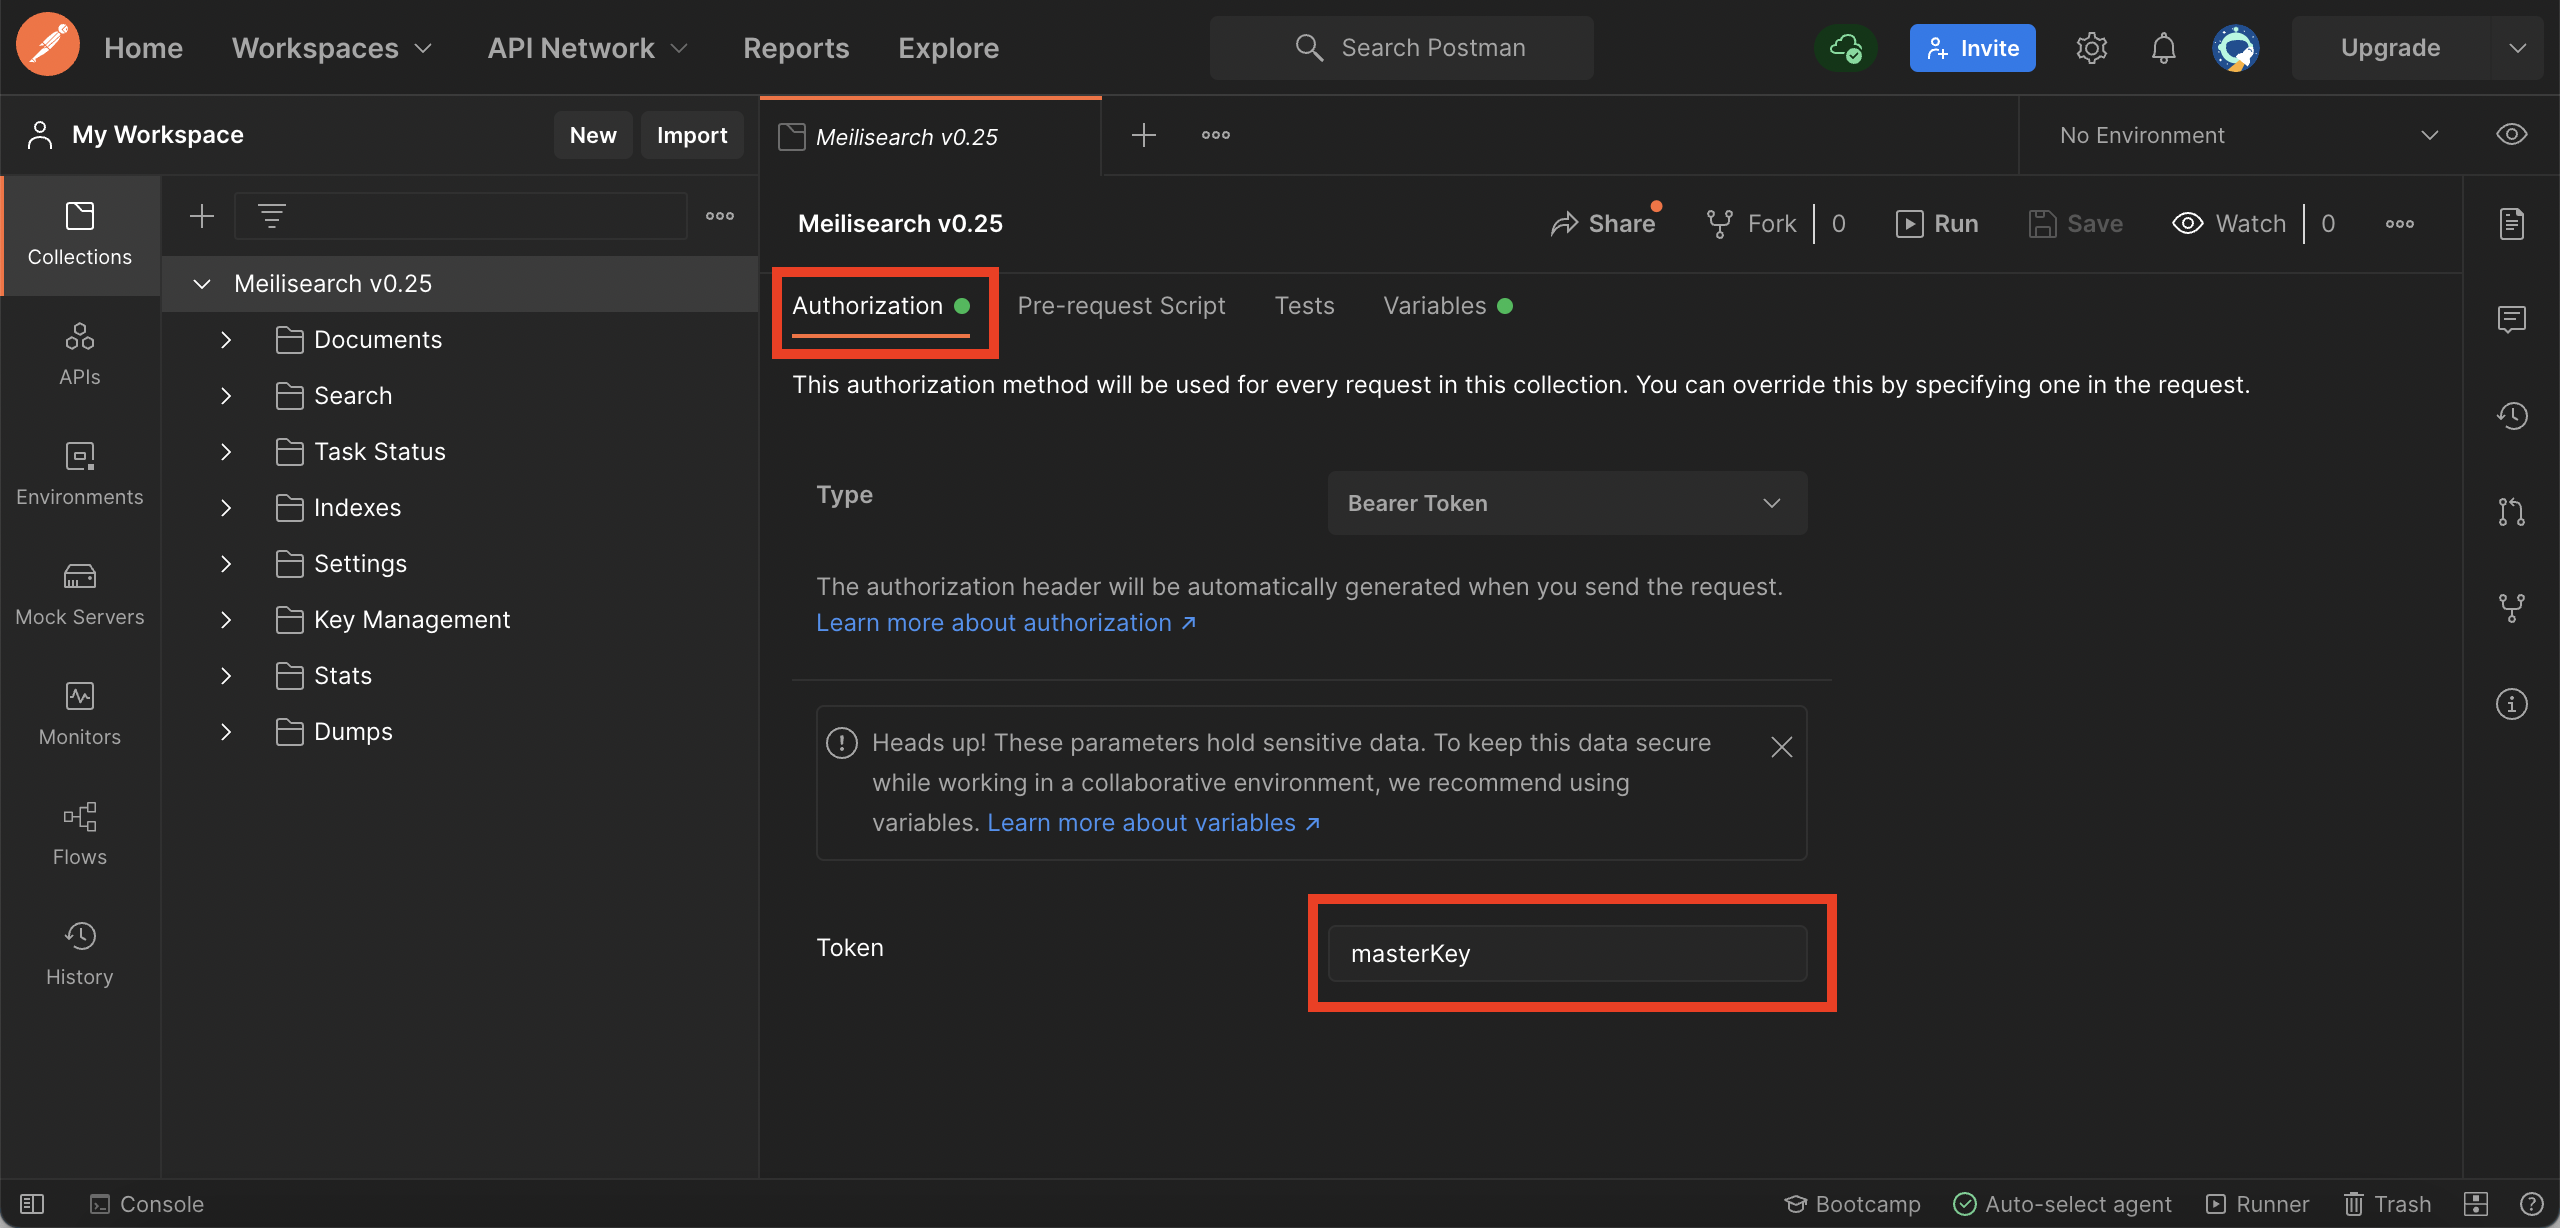
Set the "Token" if needed (set to `masterKey` by default):

<Frame>
  <img src="https://mintcdn.com/meilisearch-6b28dec2-mintlify-code-samples/G0_zdir0oCeS2jWE/assets/images/postman/set_token.png?fit=max&auto=format&n=G0_zdir0oCeS2jWE&q=85&s=4e162ccae3e1221edb2c9c2092ab3db9" alt="The 'Token' field set to masterKey and 'Type' to Bearer Token in the 'Authorization' tab." width="2560" height="1228" data-path="assets/images/postman/set_token.png" />
</Frame>

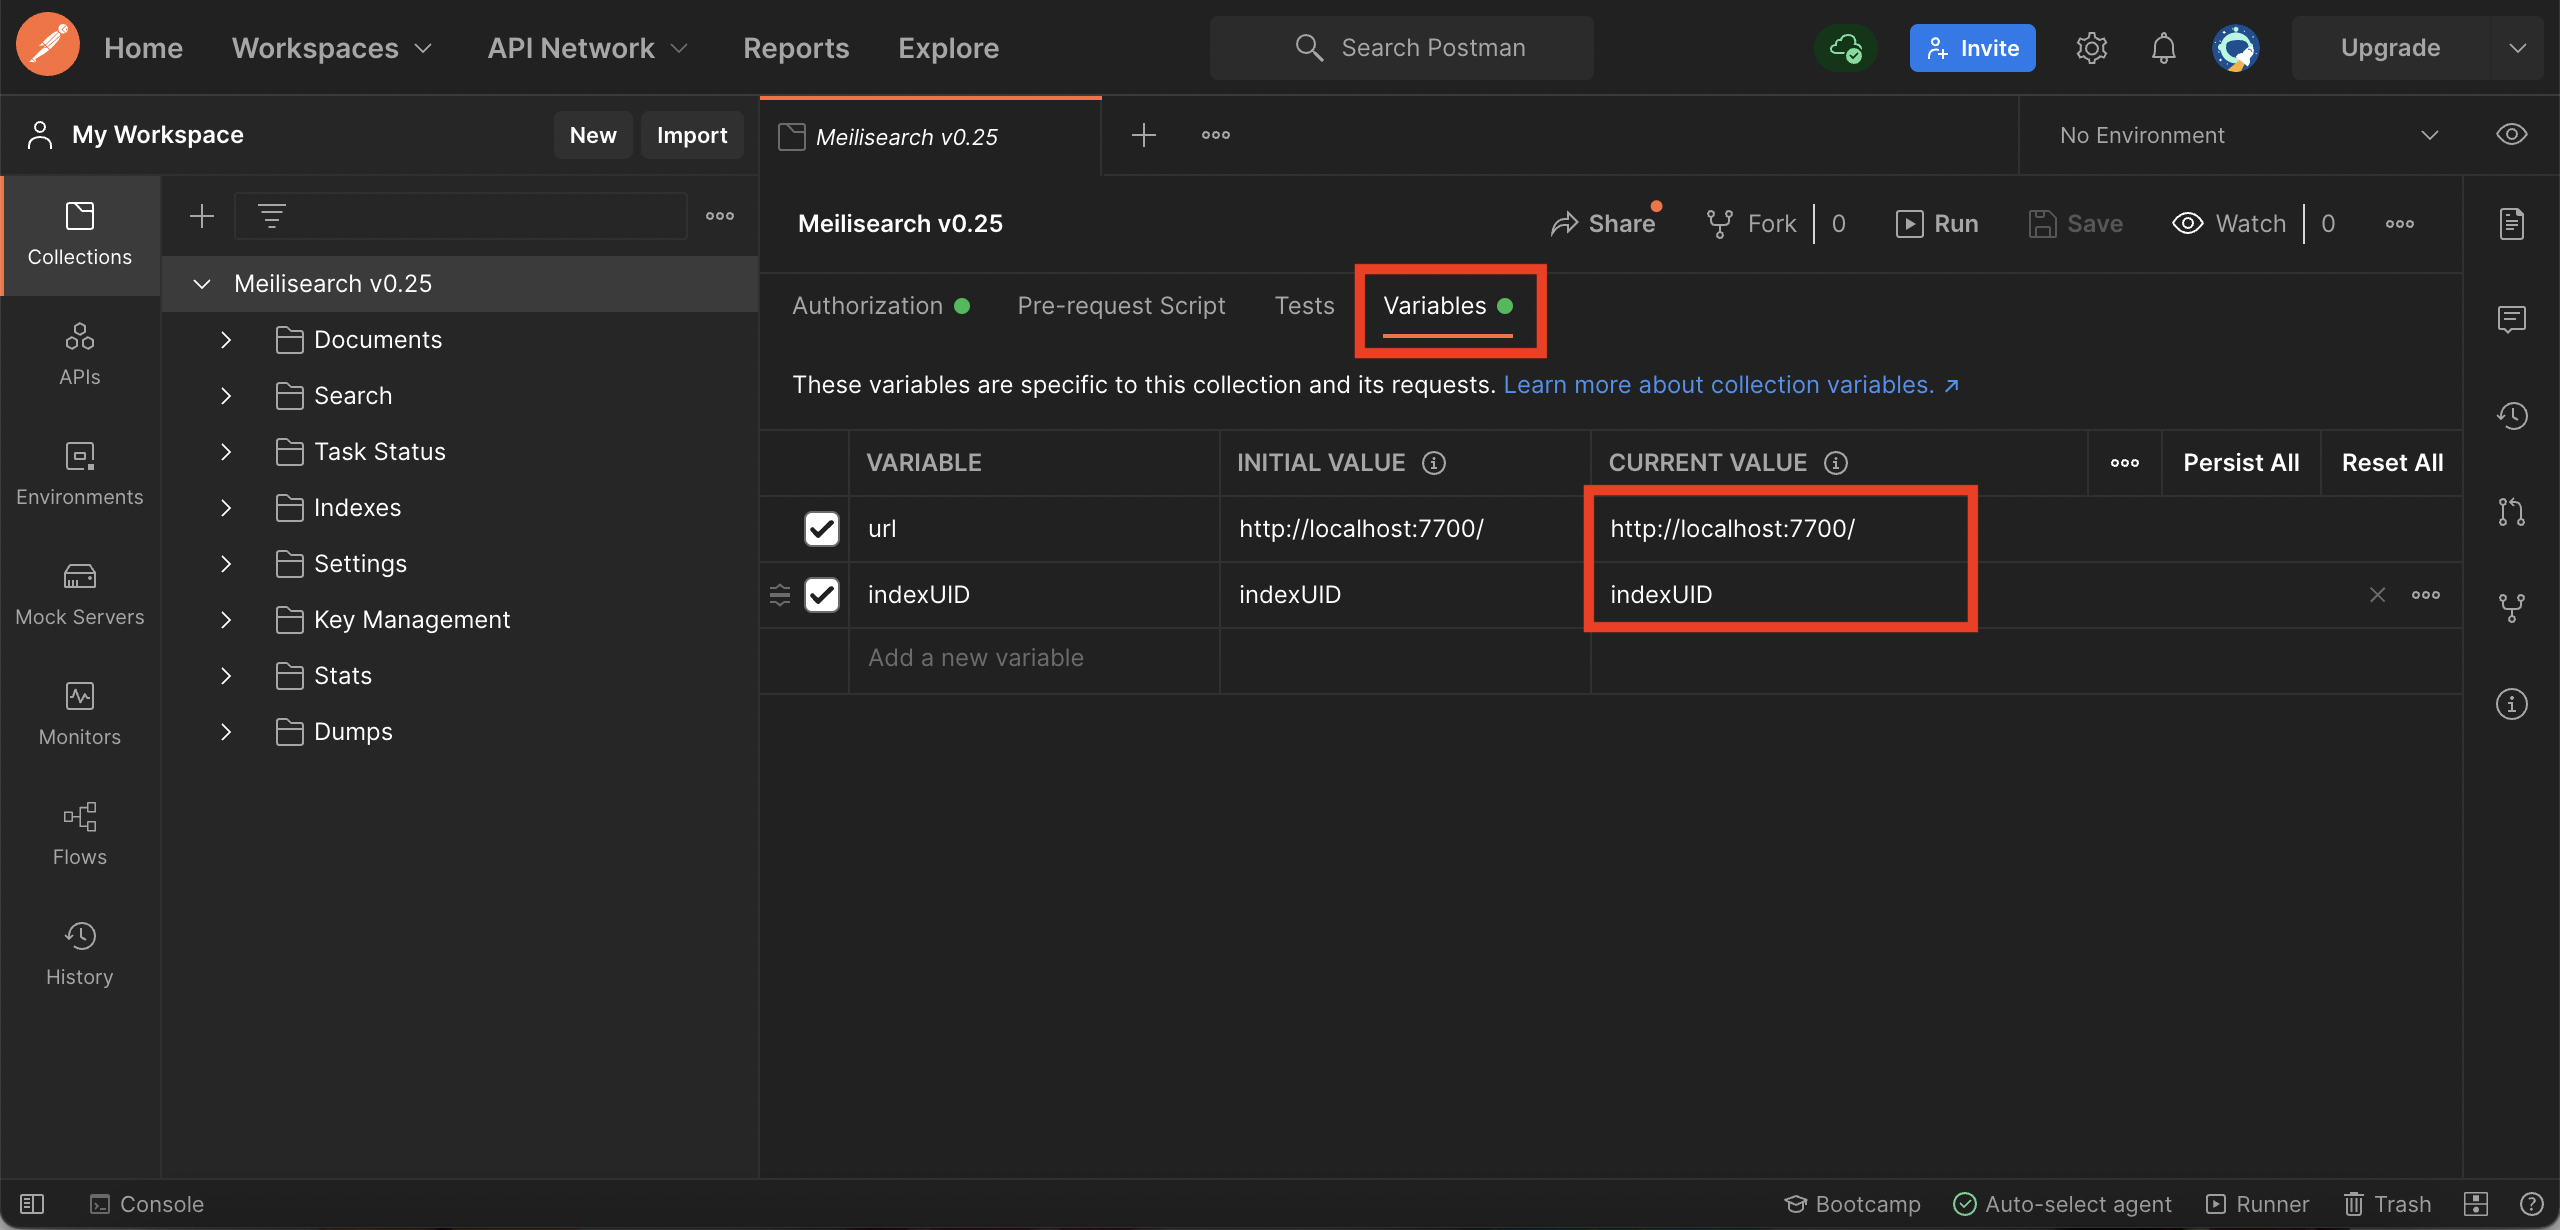
Set `url` (set to Meilisearch's local port by default) and `indexUID` (set to `indexUID` by default):

<Frame>
  <img src="https://mintcdn.com/meilisearch-6b28dec2-mintlify-code-samples/G0_zdir0oCeS2jWE/assets/images/postman/set_variables.png?fit=max&auto=format&n=G0_zdir0oCeS2jWE&q=85&s=4b28a3de39eb9166f8514c9a3a8bf88d" alt="Setting the 'URL' to http://localhost:7700/ and 'indexUID' to indexUId in the Variables tab." width="2560" height="1230" data-path="assets/images/postman/set_variables.png" />
</Frame>

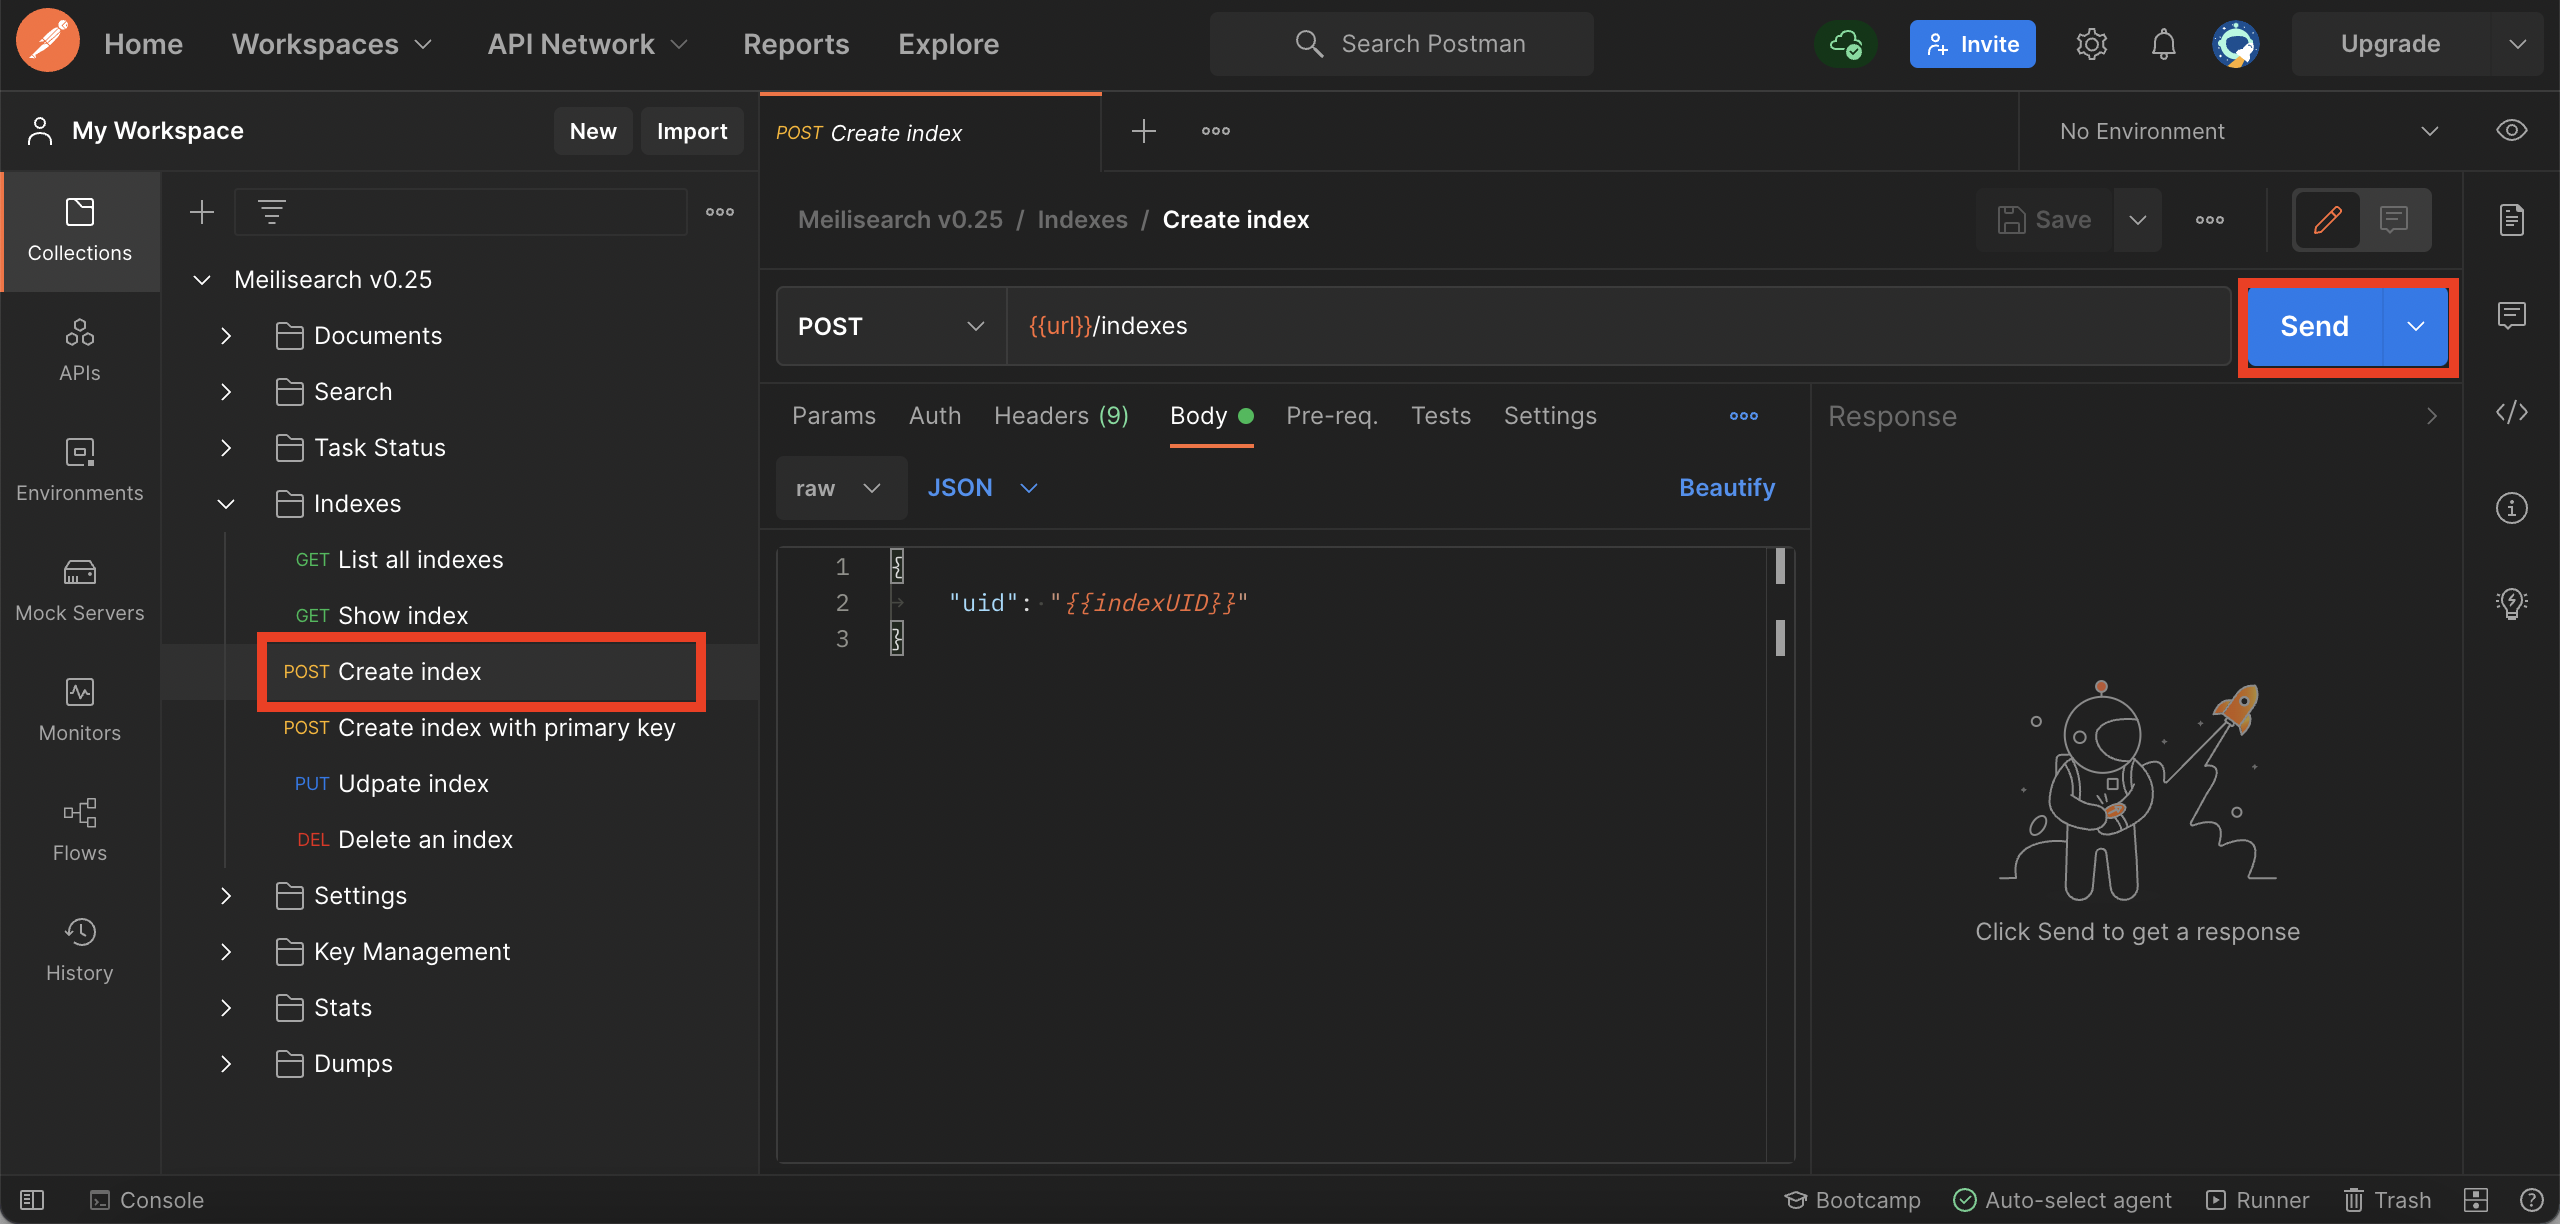
The `url` and `indexUID` variables are used in all the collection routes, like in this one:

<Frame>
  <img src="https://mintcdn.com/meilisearch-6b28dec2-mintlify-code-samples/6IveVjbqKRvobYV3/assets/images/postman/url.png?fit=max&auto=format&n=6IveVjbqKRvobYV3&q=85&s=88f4afd9c07ca1fa57a7c5fd01dfdd7c" alt="Highlighting {{url}} and {{indexUID}}" width="2560" height="1230" data-path="assets/images/postman/url.png" />
</Frame>

## Start to use it

You can now [run your Meilisearch instance](/learn/self_hosted/getting_started_with_self_hosted_meilisearch#setup-and-installation) and create your first index:

<Frame>
  <img src="https://mintcdn.com/meilisearch-6b28dec2-mintlify-code-samples/G0_zdir0oCeS2jWE/assets/images/postman/create_index.png?fit=max&auto=format&n=G0_zdir0oCeS2jWE&q=85&s=791e828e5448c4b316af80136c2a0cc0" alt="The 'Send' button" width="2560" height="1224" data-path="assets/images/postman/create_index.png" />
</Frame>
